
E Chord Guitar
The E chord guitar is one of the most important elements ever to come to the world of guitar playing. As anybody who has ever learned the guitar can tell, understanding and mastering the E chord guitar is essential no matter if you are a complete novice or a more advanced player. The chord is used in thousands of songs of all styles of music, including rock and roll, the blues, country, and folk. Now, in this ultimate E chord guitar guide, I will briefly discuss everything you want to learn about this easy chord and how to use it in your practice and music production.

Should You Worry About This E-Chord Guitar?
First things first, one must have some general knowledge on the E chord guitar. Let us have a brief on its structure before we go deeper. The E chord is a major chord consisting of three notes: E (the root), G# (the major third), and B (the perfect fifth). As played on the guitar, these notes produce a rich and ringing sound and are the combination of which forms the basis of most often used chords.
Basic E Chord Guitar Shape
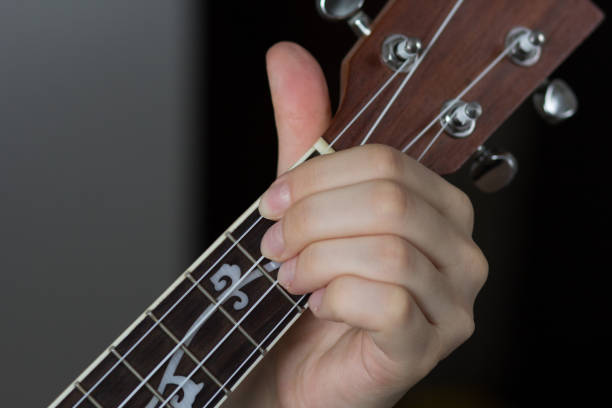
The most standard technique in which one can successfully play the E chord guitar is the open chord method. Here’s how to form this basic shape:
- Rest a small part of your index finger on the first fret of the G string; it is the third string.
- Place your middle finger on the second fret of the third string—halfway up the neck.
- Your ring finger goes on the 2nd fret of the D string, which is the fourth string on your guitar.
- Dependent on the chord being played, there are open strings in 6th string E, 2nd string B, and 1st string E.
Play A for the Rhythm by strumming all lower six strings and palm mute to also gain a sharp, strong full E chord guitar sound. This formation is quite simple for new learners, and it forms the basis for other more sophisticated patterns.
The E Chord Guitar: Its Forms and Uses
When you get familiar with the basic shape of the E chord on guitar, you can try different locations of this chord. Here are a few popular variations:
E7 Chord:
Place your pinky over the 3rd fret of the B string at the same time, retaining the basic shape of E. This makes you get an E7 chord, which comes with a blues feel in your practice.
E Major Barre Chord:
- Slide your index finger across all the strings at the 7th fret, remembering to keep it parallel to the frets.
- Put your ring finger on the thump of the 9th fret of the A string.
- Place your pinky under the fourth string and put it on the 9th fret of the D string.
- Your middle finger goes on the 8th fret of the G string.
This fingering of the E chord guitar is very flexible, and you can use it to play a major chord almost in any key since the chords are moved up or down the fingerboard.
The Common Fingerings of the E Chord Guitar
However, the fingering pattern when playing E chord guitar is very important so as to prevent any nasty fingering slippage. Here are some tips:
- For the open position, put your index, middle, and ring fingers.
- In the barre chord version, pay much attention to the tightness of the pressure applied on the note by the index finger.
- Practice Van Hemert’s use of the E chord and try using other E-adjacent chords such as A or D.
Note, these fingerings require some good practice, but over time, you will master the locations, and they will become natural while playing the E chord guitar.
The Use of Guitar E Chord in Progressions
By applying these progressions, you will be able to familiarize yourself with the sound and handling of the E chord guitar in other contexts.
More on the E Chord Guitar Technique
Once you’re comfortable with the basic E chord guitar shapes, you can explore more advanced techniques:
- To that, add suspensions Esus4 and Esus2 for creating tension and release.
- Doing hammer-ons and pull-offs while staying within the chord shape
- Partial E chords to avoid resonance and be less heavy
These techniques will give further development to your range of color, and you can be more creative using the E chord guitar.
How E chord guitar is used in different styles to which it has been applied might be useful to your investigations.
The first article is about deriving songs from E Chord Guitar, and the second one is The Ultimate List of Guitar Chords.
The E chord guitar can be a great asset while writing the songs. Here are some ideas:
- Apply it as the basis for developing themes.
- Explore Uses of E-Voicings to Add Variety to Your Music
- Transfer the E chord with other chords essentially to make new and different progressions.
Within this great sound of the E chord guitar, you are more likely to create new melodies and harmonies for your song.
Conclusion
Learning the E chord guitar is one of the most vital stages of guitar learning as a guitarist. It can be faithfully played in a simple ‘open’ tuning or in any of the further developed tuning types; this chord is dominant in quite a few musical styles and sequences. Keep in mind that nothing in guitar playing is more complex than gaining mastery of the E chord guitar; hence, it requires hard work and diligence in practice. If you don’t find it easy to begin with, don’t worry; with time and practice, the E chord will soon become second nature, and you will be using it in your progressive songs with ease. Try it more, observe how other guitarists employ this particular chord, and above all else, have fun learning a new way of playing the guitar through learning the E chord guitar.
FAQs
What makes the E chord guitar one of the chords you should learn?
The E chord guitar is considered one of the most important chords for several purposes. Firstly, this type of chord is among the most frequently used in pop music and many other types of music. As well, it is used in any standard chord progression, especially in rock and blues styles of music.
It happens that I have problems with the clean hit of the E chord guitar. Any tips?
A few tricks will help to play clean E chord guitar at the beginning because it is not very easy. First, be certain you’re pushing down with the tips of your fingers and not the pads of your fingers. This does so and helps to minimize muting adjacent strings. Second, bend your fingers more in such a way that they would not touch the nearby strings of the frets. Third, practice slowly as the fingers of their right hand switch to the next frets while checking the strings one by one.
Access the free trial page
Click this link to access the GuitarTricks.com Free Trial page >>
Click here to access the GuitarTricks.com Free Trial >>
Leave a Reply